Showing posts with label Chicken. Show all posts

Saturday, January 12, 2008

Chili 2 Ways


My new co-workers started a tradition of monthly team barbecue's...and heck, we work in hospitality, so they better be good!

Along with my lovely office-mate Brooke, our Lifestyle Director, we hosted a Chili-fest...because of the cold winter weather (65 and sunny in AZ) and because grilling in work clothes is perilous at best, and finally because Brooke and I are both Texans.

To be exact, we served cornbread muffins with honey, green salad with ranch dressing and fat-free balsamic, green chili chicken chili and traditional red chili with the fixins'...and brownie sundaes for dessert.

Here are the recipes...

The Best White Chicken Chili:
(makes 8-10 servings)

8 boneless, skinless chicken thighs, cubed, all fat trimmed
8 anaheim chilis, seeded and chopped
2 small cans fire-roasted and chopped green chilis
4 serrano chilis, seeded and chopped
1 large onion, chopped
2 garlic cloves, chopped
1 sweet green bell pepper, chopped
2 tsp salt (or to taste)
1 tsp black pepper (or to taste)
2 bottles light beer
1 package cream cheese (8 oz, I used light)
1 tsp chili powder
1 tbs ground cumin
1 tbs ground Mexican oregano
1 can white beans, drained and rinsed
Grated jack cheese or other white cheese
Sour cream
Cilantro

Directions:
If using Crock Pot (slow cooker), add all ingredients except cream cheese and turn to high. Cook for 8-10 hours, then turn to low. Two hours before serving, mix 2 tbs flour with water and mix into a smooth paste. Slowly mix into chili and turn back to high. Let cook 1 additional hour, then turn back to low, mix in cream cheese and leave on low until serving. Before serving, taste and adjust seasoning. Serve with sour cream, grated white cheese and cilantro. Hot sauce or sliced jalapenos can be added for extra heat.

If not using a Crock Pot, saute chicken in olive oil over medium heat in a large stock pot. Remove and let stand on a plate. Add chilis, pepper and onions and saute until slightly softened. Add all other ingredients (except cream cheese), plus 2 c chicken broth and let simmer for 3-4 hours. 30 minutes before serving, add cream cheese. Before serving, taste and adjust seasoning. Serve with sour cream, grated white cheese and cilantro. Hot sauce or sliced jalapenos can be added for extra heat.

Classic Beef Chili:
(makes 8-10 servings)

6 lbs lean beef chuck roast, cubed, all fat trimmed
2 jalapenos, seeded and chopped
2 each yellow, red and green bell pepper, seeded and chopped
1 large onion, chopped
2 garlic cloves, chopped
3-4 tsp salt (or to taste)
1 tsp black pepper (or to taste)
2 bottles light beer
1/2 c chili powder
1/4 c ground cumin
1 tbs ground Mexican oregano
1 can kidney beans, rinsed and drained
Sour cream
Grated cheddar or other kind of cheese
Cilantro

Directions:
If using Crock Pot (slow cooker), add all ingredients and turn to high. Cook for 8-10 hours, then turn to low. Two hours before serving, mix 2 tbs flour with water and mix into a smooth paste. Slowly mix into chili and turn back to high. Let cook 2 additional hours. Before serving, taste and adjust seasoning. Serve with sour cream, grated cheddar cheese and cilantro. Hot sauce or sliced jalapenos can be added for extra heat.

If not using a Crock Pot, saute beef in olive oil over medium heat in a large stock pot. Remove and let stand on a plate. Add chilis, pepper and onions and saute until slightly softened. Add all other ingredients plus 2 c beef broth and let simmer for 3-4 hours. Before serving, taste and adjust seasoning. Serve with sour cream, grated cheddar cheese and cilantro. Hot sauce or sliced jalapenos can be added for extra heat.

Friday, December 28, 2007

Chicken Marsala


I can't say that I have a major affinity for this popular Italian-American dish...in fact I can't ever remember ordering it in a restaurant, but for some reason it just sounded good.

Served with rice, over pasta or with a fresh vegetable (I served with sauteed baby zucchini), it's a rather easy weeknight meal.

Chicken Marsala:
(serves 2)

4 boneless, skinless chicken tenderloins, or 2 chicken breasts
Cornstarch
Salt and Pepper
Pinch cayenne pepper
1/3 c chicken broth*
8 oz crimini mushrooms, sliced
1 large (or 2 small) garlic cloves, mashed into a paste
1/3 c Marsala wine*
Olive oil as needed
Fresh chopped Italian parsley, if desired for garnish

Directions:
Pound chicken into even, thin pieces with a meat tenderizer - do this between two sheets of plastic wrap or parchment paper to not tear up the meat and for ease in clean-up.

Season cornstarch with salt and pepper and cayenne. Dredge chicken pieces in cornstarch until lightly coated on all surfaces.

Heat olive oil in a saute pan and brown chicken pieces on all sides. You may have to do this in batches to not crowd pan and ensure browning. Once all chicken has been browned, remove to a plate. Add mushrooms to the same saute pan and salt and pepper. Saute mushrooms until browning slightly and most of the liquid has evaporated. You may need to add more oil to do this. Add garlic near the end, and saute.

Deglaze pan with chicken broth and simmer until almost all liquid has evaporated. Add Marsala and simmer until reduced by half. Add chicken pieces back to pan and simmer until sauce has thickened and chicken has warmed/cooked through. Serve with fresh parsley for garnish, if desired.

*My recipe didn't result in a lot pan sauce - rather the chicken and mushrooms drank up most of the liquid and were very moist. However, if you want a bit more liquid sauce for serving, increase broth and wine amounts and/or reduce the sauce for less time.

Monday, November 12, 2007

Brie, Prosciutto & Sage-Stuffed Chicken Breasts


There is simply no excuse for the looonnggg delay since my last recipe except that I have not been cooking. Trader Joe's pre-made lunches, granola bars and coffee for breakfast and who knows what for dinner.

I did go on a girls weekend last weekend and made tomato soup and super-decadent macaroni and cheese, but mostly it's been old favorites, take-out and my very-great boyfriend cooking dinner.

My new job is all at the same time overwhelming and amazing. My net takeaway most days is why haven't I always been in this industry...coupled with thoughts of how in the world I'll get all the work done by deadline!?! Exciting and a great challenge!

It felt SO good to cook dinner tonight...like sleeping in your bed after a few weeks on the road.

Simple, amazingly delicious and fast, this is a must-make (and repeat) dinner.

Brie, Prosciutto & Sage-Stuffed Chicken Breasts:
(serves 4)

4 small or 2 large boneless, skinless chicken breasts
4-6 oz triple-creme brie, very cold and sliced into 4 thin slices
8 thin slices prosciutto (roughly the size of a small piece of bacon)
8 leaves sage
4 tbs flour
Salt and pepper
Olive oil
1/3 c dry white wine

Directions:
Cut breasts into 4 similar pieces, cut a pocket into chicken, being careful not to slice through.

Stuff with prosciutto, cheese and sage leaves. Salt and pepper liberally, dust with flour and then brown on all sides in a hot saute pan with olive oil. While sauteing, heat oven to 350. Once seared on all sides, deglaze pan with wine, then place entire pan in oven to finish (10-15 minutes, test for doneness, careful not to overcook as it will dry out chicken). Serve right away - I served with sauteed zucchini and yellow squash.

Sunday, October 21, 2007

Creamy Chicken Green Chile Enchiladas


Wow, where do I start? (FYI, the picture above is my exact current view)

I finished my last week of work and it was considerably more stressful than I thought. Then (not 100% sure of the cause but stress must be a factor) I broke out in a full-body itchy rash with no apparent cause and so between the two I had a hell of a week.

But finally...I am on vacation. I took a week off between jobs with every intention of doing nothing more than relaxing and absorbing the feeling of closure as one chapter ends and another one begins.

So here I sit, overlooking the Sea of Cortez in Mexico, listening to some vintage Dave Matthews and waves crashing, sipping a young Bordeaux and finally, finally letting some of the tension melt away.

Oh, and in what will likely be a relief to worried loyal readers, I am cooking again.

Starting things off is a recipe that is just cursed. Not the recipe per se - that always turns out delicious - but the poor un-photogenicness that it is.

I made this first way back in May for a Mexico trip, and I made it again tonight and both times was rich, spicy and delicious and both times barely survived looking better than you-know-what (hint, all the tequila drinking going on down here leads to this activity).

Also, this time I was forced to use whatever cooking gear resides in the beautiful condo I rented and sadly a baking dish was not part of standard issue, so I made it in a large saute pan. Frittata-pie-enchiladas is about what it looked like.

Anyway, I will share the recipe but please understand it tastes WAY better than it looks!

Creamy Chicken Green Chile Enchiladas:
(serves 6-8)

9 small corn tortillas (or as needed, buy a dozen to be safe)
2 c shredded cooked chicken
8 large poblano chilis
6 serrano chilis
6-8 tomatillos
1 clove garlic
1 medium yellow onion
1 8 oz package cream cheese
1 c chicken broth, water or beer (trust me, any of these work)
1 c shredded Monterey Jack, Cheddar or your favorite cheese (more if you like)
Salt and Pepper to taste
Olive oil as needed for sauteeing

Directions:
Cut chilis in half, scoop out seeds and membranes and tops (stems). Toss with olive oil and combine with peeled and washed whole tomatillos, broil until bubbling and blackened. Gently scrape off blackened skin of chilis and roughly chop, then add all chilis and tomatillo flesh (and juice) to saute pan with onions and garlic, using olive oil as needed for sauteeing. Salt and pepper to taste.

Add chicken to mixture after it softens. Saute and bring everything to heat, add liquid and cream cheese. Bring to a gentle boil.

Line bottom of baking dish (or saute pan) with sauce mixture lightly, then layer corn tortillas. Repeat, creating 2-3 layers of sauce mixture and tortillas, then top with grated cheese.

Either cool and hold (refrigerate or freeze) for cooking, or bake at 350 for 30-40 minutes at 350 until bubbling and browning on top. Let stand 10 minutes, cut into squares (or slices) and serve. (I will spare everyone seeing a slice on a plate - trust me, it's best just to dive in and eat it, not photograph it!)

Monday, August 27, 2007

Classic Chicken and Vegetable Stir-Fry (and minimalism in the kitchen)


I don't own a wok, but every time I see one at any store - from Sur La Table or Williams Sonoma (expensive) to Ikea or Target (affordable) I long for one.

Yet, my inner minimalist denies the purchase. Where will it be stored? Hmm, no cabinet space? No go.

My rule tends to be for large kitchen items - if I use it at least once a week, it can come in, otherwise, stay out. Borrow, make do or whatever, but enjoy the peace of minimal clutter (my kitchen as of tonight):

So...this means I was a bit skeptical about the success of a home-cooked Chinese stir-fry type dish without a wok. But WOW, it was easy, delicious, healthy - it shocked me how great it was. A regular repeat dish with variations is certainly planned.

But I think I can make room for at least a small wok...

Classic Chicken and Vegetable Stir-Fry:
(serves 4 with rice/noodles, 2 if served alone)

1 large boneless, skinless chicken breast, cut into bite-sized pieces and pounded thin
1 small bunch broccoli crowns, cut into small pieces
2 small carrots, peeled and cut on a bias
1 zucchini, sliced into half moons
8 oz white mushrooms, sliced
1 bunch enoki mushrooms, ends trimmed and separated
1 small bunch green onions, sliced on the diagonal
Small handful Thai red chilies (Chile Japones)
3 garlic cloves, chopped
1 tbs chopped fresh ginger
Salt and white pepper to taste
Crushed red chili pepper flakes for extra heat (as desired - I always desire)
Olive oil for sauteing
Sake or white wine or sherry or water (for deglazing pan as needed)
Slurry (mixture) of 2 tbs cornstarch, 2 tbs water, 2 tbs soy sauce
Toasted sesame seeds for garnish
Steamed rice or noodles for serving

Directions:
Heat olive oil in a large saute pan or a wok that has been preheated. Next, add aromatics - garlic, ginger and chilies. Keep heat on high the entire time.

Next, add vegetables. Saute, tossing frequently, adding deglazing liquid as needed to avoid burning. Add chicken, then slurry. Toss and continue tossing until chicken is cooked through - reduce heat to medium in the final stages if needed.

Remove from heat, pour onto plate or platter, garnish with chilies or green onions, serve.

Sunday, August 26, 2007

Tom Ka Gai (Coconut Chicken Thai Soup)


Early this year, I had pho fever. I craved it daily and eschewed perfectly wonderful leftovers or packed lunches or dinner at home - all for pho.

Beginning earlier this summer, I inexplicably traded my pho fever for Thai food mania. I could literally eat Thai food for breakfast, lunch and dinner.

I love almost all Thai food, but what I am compelled to order in every restaurant is the ever-present and classic Tom Ka Ghai soup. Now it serves as a benchmark of sorts, helping me sort through the mediocre, good and great Thai places.

So, as it often happens with me, I tried making it myself. The result? Easier than chicken noodle soup and a heck of a lot more flavorful. I have a feeling this will be a weekly event in my house!

I love my Thai food very, very hot so adjust the seasonings and spices according to your taste. The amounts below would result in a medium hot soup - so add more or less to taste.

Tom Ka Gai (Coconut Chicken Thai Soup):
(serves 2 as an entree, 4-6 as a first course)

2 c coconut milk (canned)
2 c chicken broth
2 c water
2-3 stalks lemongrass, chopped into 2-3 inch sections and bruised (crushed slightly) with the handle of a knife or meat tenderizer
Galangal (or ginger root), chopped into large cubes
Dried or fresh Thai chilies (8-10, or more), chopped and seeded (f very dry, reconstitute in warm water
Chili paste, siracha or crushed red chili flakes (to taste, for added heat)
1 small clove garlic, minced into a puree
Salt and white pepper to taste
4 tbs fish sauce
1 tsp shrimp paste
4-6 Kaffir lime leaves (or, 1 whole lime)
1/4 c sugar
1 large boneless, skinless chicken breast, cubed and pounded thin
1 c cilantro leaves
8 oz white or crimini mushrooms, sliced thin

Directions:
Bring broth, water and coconut milk to a boil. Add lemongrass, galangal (or ginger), chilies, garlic, fish sauce, shrimp paste, sugar and Kaffir lime leaves (or chopped, whole lime) and continue to simmer.

Taste soup at this point and add additional lime for sourness, salt and pepper for flavor, fish sauce for intensity, sugar for sweetness and chilies or chili paste for more heat.

Reduce to a low simmer, add mushrooms, then cilantro, then chicken. Simmer just until chicken is cooked through. Serve immediately.

Monday, June 18, 2007

Chasseur Chicken - Chicken with Mushroom Sauce


Chasseur Chicken is a culinary school classic and is also a creative and delicious thing to do with the chicken breasts that currently live in most of our freezers.

Traditionally bone-in chicken or even whole chickens could be used, but chicken breast is easy and cooks quickly. For those who find chicken breast boring or dry, any kind of chicken can be used. :)

The chasseur sauce is a sauce with mushrooms, white wine and shallots and finished with tarragon and parsley. It's a French culinary standard, referenced by many sources from Escoffier to the Food Network.

Here are a few versions from trusted sources:
Cook's Illustrated
Food Network (Bobby Flay from Boy Meets Grill)
Another one from Food Network from the The French Culinary Institutes's Salute to Healthy Cooking

I doubt I am the only one who feels like something new to do with chicken is always a good thing. Slightly unphotogenic but quite tasty, I served this with sauteed broccolini seasoned simply with salt and pepper and my classic roasted potato recipe.

Chasseur Chicken (Chicken with Mushroom Sauce):
(serves 4)

4 large chicken breasts, or 4 portions chicken
8 oz mushrooms, sliced thin
1 large shallot, chopped
4 garlic cloves, minced
2 medium tomatoes, seeded and chopped (remove skins by blanching ahead of time if you can)
1/4 c brandy
1/2 c dry white wine
2 tbs fresh tarragon, chopped
2 tbs fresh parsley, chopped
Olive oil for sauteing
Flour for dusting chicken breasts
Salt and pepper to taste

Directions:
Mise en place (everything in it's place, prepped) makes this recipe a breeze.

Dust chicken on all sides with seasoned flour (salt and pepper). Heat olive oil in a saute pan and brown chicken on all sides. Place in 350 degree oven to cook through.

In the same skillet, saute shallots until softened, then add mushrooms. You may need more oil here, add more if needed. Then add garlic and tomatoes. Salt and pepper as you go along, as needed.

Add brandy and deglaze pan. Once pan is almost dry, add wine and simmer until reduced. Once chicken is almost done (about 10 minutes total in oven), add herbs to sauce and adjust final seasonings and reduce to desired consistency. Serve over chicken.

Friday, June 15, 2007

Thai Green Coconut Curry with Chicken


I'm not sure when I first tried green curry, but I think it was at this little place in downtown Phoenix that is known for local art, late night dining and a passionate, creative chef Johnny Chu who consistently serves delicious Asian fusion cuisine.

I like any green curry now, but Chu's is so good, I want to literally swim in the sauce.

It's not always practical to head down to Fate every time I am struck with a craving for green coconut curry, so today I did some research and made it myself. Almost as good at Johnny's, and now I can make it whenever I want it.

Green curry is named for the curry paste used, which is green as opposed to yellow or red, and the subsequent coconut curry has a lovely warm green hue. I researched quite a few recipes before I came up with mine, so here are a few links to some other green curry recipes.

Green Curry from Garrett of Vanilla Garlic
Jett's Mom's Green Curry from Cee of Real Thai Recipes
Tyler Florence's Green Curry Recipe for Food Network's Food 911
Ming Tsai on Green Curry

Thai Green Coconut Curry with Chicken over Fragrant Rice:
(serves 4-6)

1 lb raw chicken, cut into small pieces
1/4 lb sweet peas
8 oz crimini or oyster mushrooms
4 medium carrots, sliced thinly
1 small onion, sliced into strips
1 can baby corn, drained and chopped
1 can coconut milk
2 c reduced sodium or homemade chicken broth
1/2 c basil, chopped in ribbons (use Thai basil if you can find it)
1/4 c cilantro, roughly chopped
Salt and black pepper to taste
Olive oil for sauteing
2-6 tbs green curry paste (store bought, or see my recipe below)
White rice, basmati rice or jasmine rice to serve with curry (3-4 c cooked)

Directions:
In a large, deep saute pan or large stock pot, saute carrots and onions in olive oil over medium high heat. Add corn, then sweet peas and mushrooms. Add salt and pepper as needed. Add curry paste (to taste, I used 6 tbs and would have liked it spicier) and then add coconut milk and broth. Taste at this point and add more paste, or salt and pepper as needed. Next add chicken and simmer on low while chicken poaches and sauce reduces slightly.

Serve over rice with limes, cilantro and basil as garnish.

Green Curry Paste:
(makes about 1 cup)

6 serrano or Thai green chilis, seeds removed if desired to reduce heat
1 tbs ground tumeric
2 tbs chopped fresh ginger
1/4 c chopped fresh lemongrass (the center, tender parts of the stalk)
1 tbs fresh lime peel or zest
1 large shallot, chopped
1 tbs shrimp paste (or 1 tsp salt if you don't have this)
1 tbs fresh ground black pepper
1 c cilantro stems
1/2 c basil stems (thai basil if you can find it)
1 tbs crushed toasted cumin seeds
1 tbs ground coriander
2 tbs olive oil
Water as needed to achieve desired consistency

Directions:
Mix all ingredients in a food processer until a paste forms. Taste it to determine heat - this will dictate how much to use in your curry.

Wednesday, January 31, 2007

Chicken Ravioli with Wild Mushroom Pan Sauce, Parmesan & Black Truffle Oil


After our beautiful sunny weekend it turned cold and rainy again so tonight I wanted something earthy and comforting as I settle in to watch the finale of Top Chef.

Another thing cheering me up is after my terrible incident (see comment 3) with my white truffle oil last week, tonight I went shopping at Trader Joe's and saw they now sell white and black truffle oil - at an unbelievable price. I told my sad story and showed my now-healing cut to the clerk who kindly gave me a free bottle of white truffle oil and I bought the black also. I LOVE Trader Joe's.

Chicken Ravioli with Wild Mushroom Pan Sauce, Parmesan & Black Truffle Oil:
(serves 1, can easily be adjusted for any number)

6 chicken ravioli (recipe below)
1/4 c dried wild mushrooms
1 tbs butter
Salt and pepper
2 tbs finely chopped fresh parsley
2 tbs Parmigiano-Reggiano, grated
1 tsp (or to taste) black truffle oil

Directions:
Boil an ample amount of salted water over high heat. Meanwhile, soak dried mushrooms in hot tap water for 20 minutes or so, until softened. Roughly chop mushrooms, reserving soaking liquid.

Drop ravioli in boiling water. Meanwhile heat skillet with butter and saute mushrooms. Add mushroom soaking liquid and reduce over high heat. When reduced by more than half, take ravioli out of boiling water, add to pan and continue to simmer.

Remove ravioli to serving dish, simmer sauce until only 2 tbs of liquid remain with mushrooms. Stir in parsley, pour over ravioli. Top with Parmesan cheese, drizzle with truffle oil and garnish with additional parsley. Serve immediately.

Chicken Ravioli:
(makes about 36 ravioli)

The chicken ravioli is a great recipe for doubling or tripling and freezing the extra. Layer ravioli between sheets of parchment paper and store in an air-tight container for up to 3 months. Drop into salted boiling water (still frozen) and they are ready in minutes.

2 large boneless, skinless chicken breasts
1 medium onion, finely chopped
2 garlic cloves, peeled, whole
8 oz mushrooms, finely chopped
1/4 c bread crumbs (or as needed to absorb moisture)
Salt and pepper to taste
Olive oil, as needed
2 tbs fresh chopped parsley
1 package round or square wonton wrappers
1 egg for an egg wash

Directions:
Poach chicken breasts and garlic in simmering water until chicken is cooked through -about 7-10 minutes. Meanwhile, sauté mushrooms, onions and garlic in olive oil until softened and turning golden. Remove from heat and combine all ingredients (except wonton wrappers & egg) in a bowl, set aside.

Mix egg with a splash of water and beat with a fork for an egg wash. Meanwhile, lay out wonton wrappers in an assembly line. Working quickly, spoon 1 full tsp filling on wonton wrapper. Using a pastry brush or your finger, spread egg wash around the edge of the wonton wrapper. Gently lay another wrapper on top, press all the air out and make a tight seal. Trim edges with a ravioli cutter.

Sunday, December 17, 2006

Pan Seared Chicken Breasts with Kumquat Jam


The farmers market had lots of great looking seasonal vegetables today, but most exciting was the kumquats. I haven't cooked before with them so this was an experiment, but the tart flavor of the kumquat "jam" did a lot for the sometimes pedestrian boneless skinless chicken breast.

Pan Seared Chicken Breasts with Kumquat Jam:
(serves 2)

2 boneless skinless chicken breasts
Salt and pepper to taste
1 tbs olive oil
1 tbs butter

For the kumquat jam:
8-10 ripe kumquats
1 c organge juice
1 tbs honey
1 tsp salt

Directions:
Chop and seed kumquats, mix with other ingredients and simmer over medium heat until fruit is softened and sauce is reduced to desired thickness (about 20-30 minutes).

Meanwhile, preheat oven to 400. Season chicken breasts with salt and pepper and sear over high heat in a saute pan with butter and oil. Once both sides are seared, place in a baking dish and finish in the oven. To serve, plate chicken and spoon jam over the top. Pass remaining jam at table.

Thursday, December 14, 2006

Chicken Mole Enchiladas


Mole, a common preparation in Mexican food, has many versions, styles and meanings. In case it's not something you have heard of, it's pronounced Moh-lay.

This recipe is based on what I think of when I think about mole sauce...a reddish brown chili-chocolate sauce that has a slight spiciness and a touch of smokiness and is usually prepared with chicken. To make this a fast weeknight recipe, you can make the sauce a prior night. Also, using chicken you have pre-made and shredded speeds this up.

Chicken Mole Enchiladas:
(serves 4)

For the enchiladas:
6-10 flour or corn tortillas (taco size)
1.5 c shredded chicken
1/4 c light sour cream
1/4 c green onions, chopped
2 c grated white cheese, divided in 2 equal parts
Salt and Pepper

For the Mole Sauce:
2 slices bacon
1 large onion, chopped
2 ribs celery, chopped
1 medium carrot, chopped
4 dried guajllo peppers, seeds & stems removed
4 cloves garlic
1/4 c warm water
1 14 oz can whole tomatoes, with juices
2 c chicken broth
1/4 c premium dark chocolate, chopped finely
Salt and pepper

Directions for Mole Sauce:
Saute bacon in a saucepan over medium high heat until fat is rendered and bacon is crispy. Remove bacon, discard or save for another purpose. Add onion, carrot and celery and saute until softened, about 5-10 minutes. Meanwhile, puree chilies, garlic and water in a food processor. Strain through fine mesh strainer.

Add tomatoes, broth and strained chili puree to vegetable mixture. Simmer on high heat for 20-30 minutes until well incorporated and sauce has reduced and thickened. Strain, pressing on solids. Stir in chocolate until melted. Salt and pepper to taste, keep sauce warm.

Directions for Enchiladas:
Mix chicken, sour cream, green onions and half of the cheese in a bowl. Salt and pepper to taste.

Lay out tortillas, fill with chicken mixture.

Roll tightly and lay in a baking dish that has a thin layer of mole sauce already spread on the bottom (to prevent sticking and burning).

Cover with remaining sauce.

Top with remaining cheese.

Bake at 325 for 30 minutes, or until golden brown and bubbling. Let stand a few minutes before serving.

Tuesday, November 07, 2006

Culinary Giants - or How I Made Homemade Tamales


There are some culinary achievements that I just chalk up to:
• Way out of my league
• Why bother when you can buy it better and cheaper
• No experience
• Takes too much time
• Scary ingredients that I can’t find in my local stores

Tamales, a regional specialty and holiday tradition, are one of those “culinary giants” for me. That is, until friend and co-worker Sarah confided that she had always wanted to try making tamales and so we joined forces.

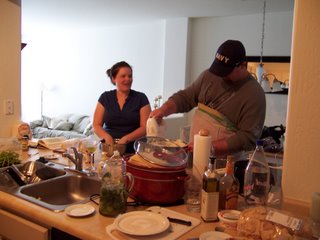
We visited Ranch Market, consulted the expert recipe provider Rick Bayless, forced our husbands/boyfriends to help, and plunged ahead.
And…we surprised ourselves. Tons of work, exhausting, but absolutely sublimely delicious. A new annual tradition. I couldn’t help but have a moment of pause as we had a modern kitchen with tons of appliances and such and still labored…I am so impressed with generations before us who made these with nothing more than basic kitchen tools and their bare hands. Impressed doesn’t do it justice.

Here are some photos of the process, and the delicious recipes.

My tips for success:
• Allow a minimum of 8 hours (esp. if you are tripling the recipe)
• I recommend at least tripling the recipe (after all that work, make a lot!!)
• Avoid the banana leaves – they look cool but are hard to work with and more expensive. Roll all in cork husks. Trust me.
• Use kitchen twine, the husk wrapper ties look cool, but 6-8 hours in you’ll find the attention to detail is a pain in the butt. Sorry if that’s cheating, but twine is oh-so-efficient!
• Make the fillings ahead of time – as they are both chili/meat stews, they keep well.
• Have at least 3-4 sets of hands for filling/rolling/tying.
• Have other food items to munch on and lots of drinks – keeps morale high and your team will see you through the end of the day.
• Your back and feet will hurt – don’t make big plans for that night.

Green Chile Chicken Tamales
By Rick Bayless*

Makes about 26


FILLING
1 8-ounce package dried corn husks, soaked in water at least 3 hours or overnight

1 pound tomatillos, husked, rinsed
4 3-inch-long serrano chiles, stemmed, chopped
4 large garlic cloves, chopped
1 1/2 tablespoons olive oil
2 cups low-salt chicken broth
4 cups (packed) coarsely shredded cooked chicken (about 1 pound; from purchased rotisserie chicken)
2/3 cup chopped fresh cilantro

DOUGH
1 1/3 cups lard or solid vegetable shortening
1 1/2 teaspoons salt (omit if masa mixture contains salt)
1 1/2 teaspoons baking powder (omit if masa mixture contains baking powder)
4 cups freshly ground masa dough for tamales (34 to 36 ounces), or make masa dough with 3 1/2 cups masa harina (corn tortilla mix; about 17 ounces) mixed with 2 1/4 cups warm water
2 cups (about) low-salt chicken broth

FOR FILLING : Place husks in large pot or large bowl; add water to cover. Place heavy plate on husks to keep submerged. Let stand until husks soften, turning occasionally, at least 3 hours and up to 1 day.

Preheat broiler. Line heavy baking sheet with foil. Arrange tomatillos on prepared sheet. Broil until tomatillos blacken in spots, turning once, about 5 minutes per side. Transfer tomatillos and any juices on sheet to processor and cool. Add chiles and garlic to processor and blend until smooth puree forms. Heat oil in medium saucepan over medium-high heat. Add tomatillo puree and boil 5 minutes, stirring often. Add broth. Reduce heat to medium; simmer until sauce coats spoon thickly and is reduced to 1 cup, stirring occasionally, about 40 minutes. Season with salt. Mix in chicken and cilantro. (Can be made 1 day ahead. Cover and chill.)
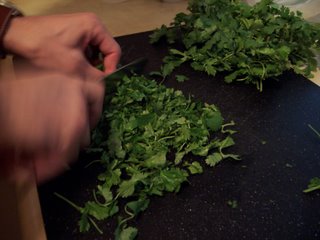
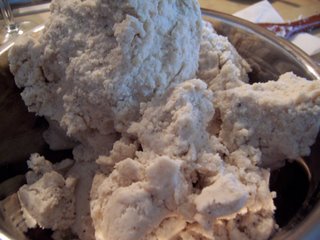
FOR DOUGH : Using electric mixer, beat lard (with salt and baking powder, if using) in large bowl until fluffy. Beat in fresh masa or masa harina mixture in 4 additions. Reduce speed to low and gradually beat in 1 1/2 cups broth, forming tender dough. If dough seems firm, beat in enough broth, 2 tablespoons at a time, to soften.
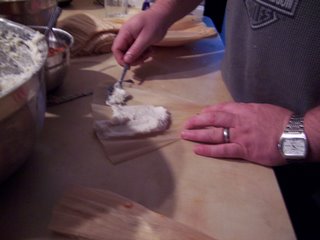
Fill bottom of pot with steamer insert with enough water (about 2 inches) to reach bottom of insert. Line bottom of insert with some softened corn husks. Tear 3 large husks into 1/4-inch-wide strips to use as ties and set aside. Open 2 large husks on work surface. Spread 1/4 cup dough in 4-inch square in center of each, leaving 2- to 3-inch plain border at narrow end of husk. Spoon heaping tablespoon filling in strip down center of each dough square.
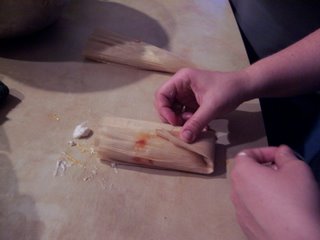
Fold long sides of husk and dough over filling to cover. Fold up narrow end of husk. Tie folded portion with strip of husk to secure, leaving wide end of tamale open.
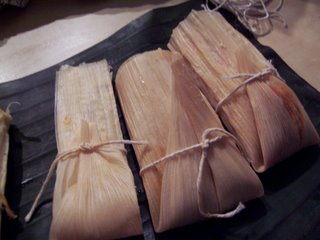
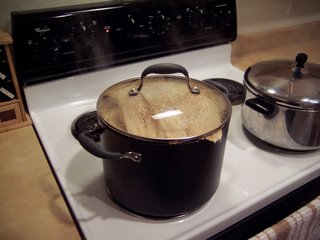
Stand tamales in steamer basket. Repeat with more husks, dough, and filling until all filling has been used. If necessary to keep tamales upright in steamer, insert pieces of crumpled foil between them. Bring water in pot to boil. Cover pot and steam tamales until dough is firm to touch and separates easily from husk, adding more water to pot as necessary, about 45 minutes. Let stand 10 minutes. (Can be made 2 days ahead. Cool 1 hour. Cover and chill. Before serving, re-steam tamales until hot, about 35 minutes.)
Red Chili Pork Tamales
By Rick Bayless*

Makes about 18 tamales


For the filling:
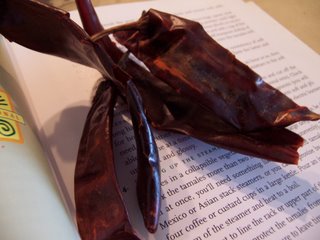
16 large (about 4 ounces) dried guajillo chiles, stemmed, seeded and each torn into several pieces
4 garlic cloves, peeled and chopped
1/2 teaspoon black pepper, preferably freshly ground
1/4 teaspoon cumin, preferably freshly ground
1 1/2 pounds lean boneless pork (preferably from the shoulder), cut into 1/2-inch cubes
Salt

For the batter:
10 ounces (1 1/3 cups) rich-tasting pork lard (or vegetable shortening if you wish), slightly softened but not at all runny
1 1/2 teaspoons baking powder
2 pounds (4 cups) fresh coarse-ground corn masa for tamales OR 3 1/2 cups dried masa harina for tamales mixed with 2 1/4 cups hot water
1 to 1 1/2 cups chicken broth
2 1-pound packages banana leaves, defrosted if frozen

1. Preparing the filling. In a large blender or food processor (or working in batches), combine the chiles, garlic, pepper and cumin. Add 3 cups water, cover and blend to a smooth puree. Strain the mixture through a medium-mesh strainer into a medium-size (3-quart) saucepan.
Add the meat, 3 cups water and 1 teaspoon salt. Simmer, uncovered, over medium heat, stirring regularly, until the pork is fork-tender and the liquid is reduced to the consistency of a thick sauce, about 1 hour. Use a fork to break the pork into small pieces. Taste and season with additional salt if necessary. Let cool to room temperature.

2. Preparing the batter. With an electric mixer on medium-high speed, beat the lard or shortening with 2 teaspoons salt and the baking powder until light in texture, about 1 minute. Continue beating as you add the masa (fresh or reconstituted) in three additions. Reduce the speed to medium-low and add 1 cup of the broth. Continue beating for another minute or so, until a 1/2-teaspoon dollop of the batter floats in a cup of cold water (if it floats you can be sure the tamales will be tender and light). Beat in enough additional broth to give the mixture the consistency of soft (not runny) cake batter; it should hold its shape in a spoon. Taste the batter and season with additional salt if you think necessary.
For the lightest textured tamales, refrigerate the batter for an hour or so, then rebeat, adding enough additional broth or water to bring the mixture to the soft consistency it had before.

3. Preparing the banana leaves. Unfold the banana leaves and cut off the long, hard sides of the leaves (where they were attached to the central vein). Look for holes or rips, then cut leaves into unbroken 12-inch segments (you will need 20). Either steam the segments for 20 minutes to make them soft and pliable, or one at a time pass them briefly over an open flame or hot electric burner until soft and glossy.

4. Setting up the steamer. Steaming 20 leaf-wrapped tamales can be done in batches in a collapsible vegetable steamer set into a large, deep saucepan (if you stack the tamales more than two high they will steam unevenly). To steam the whole recipe at once, you’ll need something like the kettle-size tamal steamers used in Mexico or Asian stack steamers, or you can improvise by setting a wire rack on 4 coffee or custard cups in a large kettle.
It is best to line the rack or upper part of the steamer with leftover scraps of banana leaves to protect the tamales from direct contact with the steam and to add more flavor. Make sure to leave tiny spaces between leaves so condensing steam can drain off.

5. Forming the tamales. Cut twenty 12-inch pieces or string or thin strips of banana leaf. One at a time, form the tamales: Lay out a square of banana leaf, shiny-side up, and spread 1/3 cup of the batter into an 8x4-inch rectangle over it (as shown in the illustration). Spoon 2 tablespoons of the filling over the left side of the rectangle of batter, then fold in the right third of the leaf so that the batter encloses the filling. Fold in the uncovered third of the leaf, then fold in the top and bottom. Loosely tie the tamales with string and set them in the steamer.

6. Steaming and serving the tamales. When all the tamales are in the steamer, cover them with a layer of banana leaf scraps or leftovers. Set the lid in place and steam over a constant medium heat for about 1 1/4 hours. Watch carefully that all the water doesn’t boil away and, to keep the steam steady, pour boiling water into the pot when more is necessary.

Tamales are done when the leaf peels away from the masa easily. Let tamales stand in the steamer off the heat for a few minutes to firm up. For the best textured tamales, let them cool completely, then re-steam about 15 minutes to heat through.

Working Ahead: Both filling and batter can be made several days ahead, as can the finished tamales; refrigerate, well covered. Re-steam (or even microwave) tamales before serving. For even more flexibility, batter, filling or finished tamales can be frozen. Defrost finished tamales in the refrigerator overnight before re-steaming.

* Recipes excerpted from Mexico One Plate at a Time by Rick Bayless (Scribner). Please note that recipes are copied and pasted from the Web published version.

Wednesday, October 25, 2006

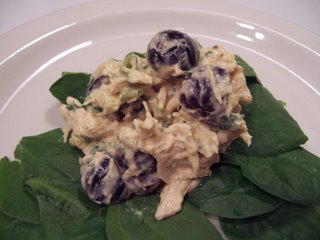
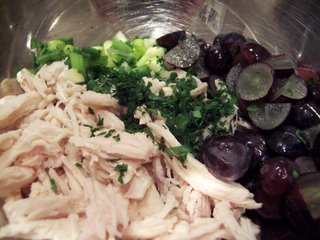
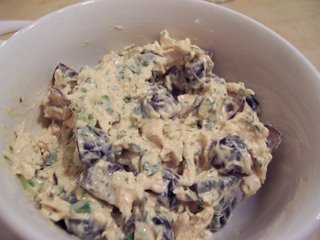
Curry Chicken Salad with Fresh Herbs & Black Grapes


Don't we all struggle with making an appetizing lunch that we will actually eat? I know my coworkers and friends and I are not alone in having a bulging fridge with ever-increasingly funky leftovers and yet we continually make a mad dash to go out to lunch nearly every day.

So, to be figure and budget friendly, here is a recipe for something that I actually can't wait to eat for lunch. Sweet and a little spicy, serve in a sandwich, over greens, in a pita, wrap or with crackers.

Curried Chicken Salad with Fresh Herbs & Black Grapes:
(recipes serves 4, can be adjusted easily)

1 cup shredded skinless chicken breast (poached, roasted or whatever)
1/2 cup quartered black seedless grapes
1/4 cup chopped green onions
1/4 cup light mayo (or as needed for desired consistency)
1 tsp dijon mustard (or as needed for taste)
2 tbs chopped fresh parsley
1 tbs curry powder (or to taste)
Salt and fresh ground pepper to taste

Directions:
Add all ingredients to a mixing bowl.

Combine, but don't overmix and crush ingredients. For best flavor, let sit in refrigerator for at least an hour or overnight.

Monday, October 16, 2006

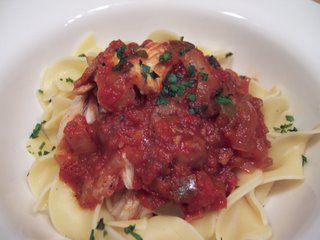
Chicken Cacciatore


This is a very old recipe with probably 1,000 ways to make it the "right way," and of course I am sure mine isn't one of them, but right to me is what works and this worked great! Delicious, simple and will make superb leftovers.

One note about cooking time - if you arrive home at 8 p.m. after a workout, starving, use boneless chicken breasts or tenderloins - NOT bone-in chicken or you'll eat at 10:30 like I did. Just a note of caution.

Chicken Cacciatore:
(serves 4-6)

4 average size or 3 large bone-in chicken breasts, skin on
1 large onion, chopped
1 green pepper, chopped
4-6 garlic cloves, minced
8 oz fresh sliced button mushrooms
1 28 oz can whole tomatoes, tomatoes & juice
2 tbs olive oil, or as needed
2 tbs fresh chopped rosemary
2 tbs fresh chopped parsley
2 tbs balsamic vinegar
1.5 c red wine
Salt and Pepper to taste
Crushed red pepper to taste
Cooked egg noodles/pasta for serving

Directions:
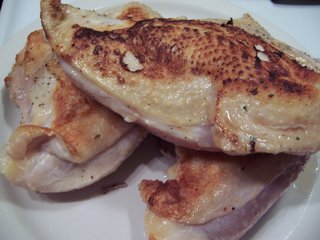
Season chicken and brown in a skillet on high heat with olive oil. Remove from skillet, set aside on a plate.

Saute chopped onion, pepper and garlic in the same saute pan until softened and the crusty brown bits have been absorbed.

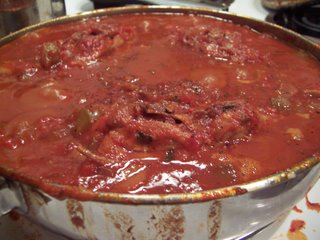
Add mushrooms, cook until soft and all liquid is gone. Add red wine, reduce by half at least. Add balsamic and then tomatoes, chopping roughly with stirring spoon. Add rosemary. Simmer until reduced, then add chicken back in. If sauce is too dry, add up to 1/2 cup water or stock. Simmer chicken this way for 20-60 minutes. This depends on how large the chicken pieces are, you want fall-off-the-bone tender and the sauce reduced enough to be the right consistency for pasta.
Once chicken is done and sauce is thickened, season again to taste with salt and red and black pepper. Serve over egg noodles or pasta. Garnish with fresh parsley and serve with red wine - preferably the same one you used for the sauce.