Showing posts with label Snacks. Show all posts

Saturday, February 09, 2008

Steamed Mussels


My life over the past few weeks might appear void of cooking (see lack of blog posts), but after thinking it over for a few minutes, food really has been everywhere.

Catching up with really good friends over wine and cheese after work, entertaining very-important visitors (Corporate PR & our NYC-based PR firm) to the soon-to-be opened luxury resort & spa where I work involved excellent meals on the town, keeping Brian fed with soup and his favorite snacks when he had knee surgery a week ago and then of course the normal feeding of me and Brian involving lots of old standbys and favorites (steak, fish, bratwurst for Super Bowl, etc.)

And oh yeah, brown bag lunches, pasta and take-out. :)

Work is amazing. I try and stop each day and think about how lucky I am to be at the beginning and have a part in shaping what we will become. Over the past month we have been working with our F&B Talent on the restaurant concepts (still top secret!) and I have happily been involved in the process. Pinch me!

Back to cooking, this is a VERY simple recipe that for some reason I have never attempted at home. All it really requires are some very good, very fresh mussels.

Steamed Mussels:
(serves 1 as an entree, 2-3 as an appetizer)

1 lb fresh, scrubbed & rinsed mussels
1/2 c dry white wine
2 tbs butter
1/4 c fresh chopped parsley
2 cloves garlic, smashed
Cracked black pepper to taste
Crusty baguette for sopping up all the yummy sauce

Directions:
Rinse mussels, ensure beard is trimmed. (cut with kitchen shears if not) Bring wine to a simmer in a large saucepan. Add butter, garlic and parsley. Bring to a simmer. Add mussels, cover tightly and let steam for about 10 minutes, or until all mussels are opened. Remove from heat, discard any mussels not opened and serve with broth ladled over top of mussels and bread for sopping up the sauce.

Monday, October 22, 2007

Shrimp Tacos


Almost a year ago, I posted a bit about fresh gulf shrimp, but as I sit here looking out over the calm water of the Sea of Cortez, lit by moonlight and twinkling with the light of shrimp boats, I must revisit.

I got a fresh pound today and their sweet, briny un-fishy smell was just the first indication of how good they were going to be.

This is a simple recipe for a fairly authentic shrimp taco.

Shrimp Tacos:
(makes 2 tacos, can easily be adjusted)

4 small corn tortillas (double up each taco to prevent breakage)
8 medium or large shrimp, peeled and deveined and butterflied
1/2 c shredded cabbage
1/4 c light sour cream
2 tbs chopped cilantro, plus extra for garnish
1 tbs lime juice, plus 1 lime wedge for garnish
Salt and pepper to taste
Butter or olive oil as needed
Cayenne pepper to taste (optional)

Directions:
Heat tortillas over medium heat in a dry skillet until warm and starting to form small brown spots. Set aside on a plate. Mix sour cream, cayenne, salt & pepper, lime juice and chopped cilantro, set aside.

Lightly heat cabbage in a skillet with a bit of butter or olive oil, salt and pepper, just to soften and warm. Set aside.

Saute shrimp in olive oil or butter, salt and pepper (and cayenne pepper if desired) over medium heat just until done. Build taco by placing cabbage on the prepared tortillas, then top with shrimp, sour cream sauce and extra cilantro. Serve immediately.

Sunday, September 23, 2007

Quail Egg Deviled Eggs


I love deviled eggs - they are the perfect retro appetizer. So, when I brought home a little carton of quail eggs and had nothing to make with them but adored their cuteness, I finally just used them to make mini deviled eggs. Mini like an inch long and half an inch wide kind of mini.

Wow are these little guys cute. I mean squealing in my kitchen kind of cute! And they tasted delicious - no different to me than chicken eggs - but delicious. I will be serving these at every cocktail party I host this season.

Anyone have any other uses for quail eggs?

Quail Egg Deviled Eggs:
(makes 20 halves)

10 quail egss
2 tbs mayo (I used light mayo)
1 tbs dijon mustard
1 tsp (or more) spice seasoning such as Penzey's Old World blend (a concoction featuring paprika, salt, sugar, pepper, celery salt, garlic and onion)
Dried dill (or fresh) for garnish
Finely chopped shallot for garnish (optional)

Directions:
Place eggs in a small saucepan, cover with cool water. Bring to a boil, then turn off heat. Let stand 5 minutes. Drain and let cool. Peel, cut in half, carefully remove yolks and mix with remaining ingredients (except garnish). Place yolk mixture in a plastic sandwich bag (or piping bag), cut off tip and pipe back into egg whites. Top with garnish and serve.

Look how little they are compared with the glass of wine!

Thursday, August 30, 2007

Chocolate Chip Oatmeal Energy Bars


Wow, Kirsten baked something?!!?? Well...sort-of.

The nice people over at Matisse and Jack's sent me a sample of their TrailBlaze Bake-At-Home Oatmeal Energy bar mix and surprising me a bit, the finished product was great!

I love the idea of a healthier, more environmentally sensitive snack bar/breakfast bar/energy bar, but sometimes those sorts of products taste so awful they aren't worth the trouble. Not these!

Literally easier than instant brownies, I made these in minutes. I liked them enough that I ate a half of a bar with a glass of wine while reading in bed. Only the elite snacks earn that spot, so I can confidently say that if you live in Northern California or British Columbia, grab a box at the store and give these a try - or if you live anywhere else, buy a box online.

There are several ways to make them (different wet ingredients), but below is my recipe.

Anyone know of any good not-from-a-mix bar recipes? I have been wanting to try make a granola bar at home, so please post a comment or send a link if you know of one!

Chocolate Chip Oatmeal Energy Bars:
(makes 9-12 bars, depending on how you cut em)

1 box Matisse and Jacks Trailblaze Bake-at-Home Oatmeal Energy bar mix (I tried chocolate chip)
2/3 c unsweetened applesauce
1/2 c 2% Greek yogurt
1 tsp vanilla extract
1/4 c crushed high-quality 70% or more cacao dark chocolate (or choc chips)

Directions:
Mix all ingredients except chocolate. Spread into a lightly greased 8 x 8 baking pan. Sprinkle chocolate pieces over top. Bake at 350 for about 30 minutes. Let cool, cut and serve (or store for eating later on-the-go).

Sunday, July 15, 2007

Prosciutto, Fig & Mascarpone Bruschetta


I can still remember the day I first had this bruschetta - July 3, 2002. It was my first week on a new job and in celebration of the 4th of July holiday weekend the whole office went to a new (at the time) wine bar and cafe in a great little neighborhood of Phoenix for happy hour. The boss paid, which was even better.

Fast forward a few years and I am no longer at that job, the place is no longer new or just a neighborhood favorite and it's routinely mobbed. The owners have expanded and opened new restaurants, the prices have jumped a few dollars and the parking is absolutely unacceptable, but I still love the bruschetta at Postino Wine Cafe.

A blatant rip-off of one of 10 bruschetta options at Postino, I created this little meal for a lazy Sunday afternoon, sipping some wine and catching up on reading. But let's be honest that the combination of salty prosciutto, sweet figs and creamy cheese is not exactly new...so I don't feel too bad about my copycat.

Make this for your next cocktail/wine party - it's great!

Prosciutto, Fig & Mascarpone Bruschetta*:

Fresh crusty bread
Prosciutto
Dried black mission figs, sliced thinly
Mascarpone cheese
Extra virgin olive oil
1 clove garlic, peeled and sliced in half
Sea salt and fresh ground black pepper

Directions:
Slice the bread into 1 inch slices. Rub with garlic clove (just to scent bread). Drizzle with olive oil, salt and pepper and bake at 350 just until warm and slightly crisp. Remove from oven, let cool for a few minutes and then spread with mascarpone. Top with sliced figs, then prosciutto, then another sprinkle of salt and pepper and drizzle of olive oil. Cut into pieces and serve.

* A note about this recipe. Because it is simple and with few ingredients, the quality of ingredients matters A LOT. Buy the best you can find, or substitute something else.

Tuesday, June 19, 2007

Book Club Cheese and Fruit Plate


Last fall I hosted my book club for a brunch, and it was my turn again, only this time on a Monday night.

My approach had to be different - what could I serve with wine that is satisfying and easy enough for me to throw together after work on a Monday and so I can enjoy the meeting too?

A cheese plate with fun accompaniaments, "mojito" water and wine was simple, delicious and I do hope popular. Thanks to everyone for coming, and I hope you enjoyed everything!

The Ultimate Fruit and Cheese Plate:
(not exactly a recipe, but it serves 6-8)


3-4 varieties of cheese - I used a triple-cream brie, a creamy roquefort, a semi-soft cheese (forgot to write down what it was, but was mild and creamy with an orange rind) and finally goat cheese that I rolled in crushed dried tarragon, parsley, salt and pepper.
Mixed seedless grapes
Dry roasted salted almonds
Cornichons (baby gherkin pickles)
Medley of olives
Pinot Grigio-Cured hard salami from Trader Joe's
Assorted crackers and oven-warmed french bread

On the side/dessert:

Fresh strawberries
Dark chocolate - 72% cacao
Razz cherries (dried cherries infused with raspberry essence)

To drink:
"Mojito" water (fresh mint leaves and lime wedges in ice water)
White and red wines

Directions:
Spread out food onto platters/plates/bowls, open wine, serve and enjoy!

Saturday, May 12, 2007

Sunomono (Cucumber Salad)


Sunomono is the rice-vinegar based salad that is often a light first course in Japanese cuisine. It usually contains cucumbers, sometimes noodles and can include a variety of other ingredients.

If you haven't tried it, you must. It's fresh and healthy and the perfect light snack.

For best results with sunomono (and with most recipes), use an English/Hothouse/Seedless cucumber. That's the really long one that is wrapped in plastic in the grocery store. It's usually slightly more expensive, but it doesn't have the waxy large seeds, waxy inedible green skin and the watery flesh in the center like the normal cucumbers, rather, the entire cucumber is edible and quite delicious.

Sunomono (Cucumber Salad):
(serves 2)

1 seedless cucumber, peeled and sliced into half circles
2 tbs rice vinegar
1 tsp (approx) sugar
Sprinkle of sea salt
1/8 tsp (approx) soy sauce
Sesame seeds (if desired)

Directions:
Sprinkle cucumber slices with salt, toss to coat and drain in a strainer over the sink. Meanwhile, mix the vinegar, sugar and soy sauce. Return the cucumbers to a bowl and toss with dressing. Sprinkle with sesame seeds if desired.

Sunday, April 29, 2007

Caramelized Onion & Mushroom Pizza


In honor of my grandmother's birthday (Happy Birthday Dottie!) my family gathered at my parent's house last night for an Italian dinner. No, we are not in any form Italian by heritage but we certainly can appreciate the food.

I've always thought Italian food is custom-designed for sharing, collaborating and gathering friends and family together to celebrate.

My mom made a classic meat lasagna and chicken breast braised in fresh tomato sauce over cappelini, my sister-in-law made a romaine salad which was topped with Parmesan and fresh sourdough croutons (recipe below) and I made a Caramelized Onion & Mushroom flatbread pizza.

Not surprising to anyone who knows me, I also supplied the wine, which was a cheap and cheerful (but quite drinkable) Cabernet from France called Fortant. Look for it at select Trader Joe's stores.

Here are a few recipes from the evening.

Simple Sourdough Croutons:
(makes about 2 cups)


3-4 slices sourdough bread, cut into chunks
Olive oil to coat
Sea salt and fresh ground black pepper
Chopped Rosemary

Directions:
Toss bread with olive oil and seasonings, bake at 450 until golden brown and crisp.

Caramelized Onion & Mushroom Flatbread Pizza:
(makes about 16 small pieces)

1 lb fresh pizza dough (I used Trader Joe's)
Olive oil as needed
Salt and pepper
Chopped rosemary
2 c shredded sharp Cheddar or mozzarella
8 oz. sliced crimini mushrooms

4 medium onions, cut into thin slices
2 tbs butter
Salt and black pepper

Directions:
Slice onions and saute in butter until softened. Season with salt and pepper. Turn heat WAY down and continue to cook onions, stirring frequently, until deep golden brown and sweet (caramelized). This can take up to 45-60 minutes total. Be patient and resist the temptation to turn up the heat. This can be done ahead of time.

Once onions are done (if not pre-made), begin assembling the pizza. Preheat oven to 500 and roll out the dough on a baking sheet that you have sprayed or smeared with olive oil (or use a silicon baking sheet). Drizzle with olive oil and sprinkle with salt and pepper and chopped rosemary. Bake for 5-7 minutes or until puffed up and beginning to turn golden around the edges and is no longer raw in the middle.

Remove from oven and top with caramelized onions, sliced mushrooms, cheese and season again with pepper, salt if needed and remaining amount of chopped rosemary. Return to oven and bake until cheese is melted, mushrooms are fully cooked and pizza is beginning to brown. Slice and serve.

Sunday, April 22, 2007

Cheese-Filled Figs in Salami


Creating an inspired hors d'oeuvre when starving and in a strange grocery store that is not always the best can be hard to do, but this turned out surprisingly great.

Even more easy-going, these get better after sitting out for a while. If your grocery store is better stocked than where I went, consider mascarpone instead of cream cheese, and perhaps a drizzle of pesto or pureed basil. The store I went to was clean out of basil. :)

Cheese-Filled Figs in Salami:
(makes about 20 appetizers)

8 oz thin-sliced premium salami (get the best you can, it matters)
4 oz cream cheese or mascarpone, softened to room temperature
2 tbs balsamic vinegar, plus extra for drizzling
Olive oil
Salt and pepper to taste
Dried black mission figs
Toothpicks

Directions:
Mix cream cheese (or mascarpone) with balsamic and black pepper and salt to taste. Cut off tops of figs, scrape out insides, fill with cream cheese/mascarpone mix. I used a plastic sandwich bag with the tip cut off as a piping bag to fill the figs.

Wrap filled fig with a piece of salami and spear with a toothpick to hold in place. Drizzle with balsamic, olive oil and pesto (if using) and season with salt and pepper. Serve.

Wednesday, March 14, 2007

Razz Cherries, Martinis, Spring Weather and a Beach Vacation


It's spring in Phoenix. At least 80 every day and lately over 90 degrees, and all I can think about is the beach, a cold cocktail and light food that hasn't been touched by an oven. That and relief from terrible allergies.

Last Friday night, after many long months of being too busy or grown up to go out, I went out with one of my best girlfriends and had at least a few too many martinis. This (road trip not recommended when hung over) preceded a Saturday road trip with some dear friends and their darling baby.

We went to Cottonwood and mile-high Jerome Arizona for a quaint day trip of shopping, lunch and a tremendous view.

And...after sampling these on a cheese plate a local restaurant, I personally procured my own Razz Cherries at Mount Hope Foods in Cottonwood - a wholesaler and retailer of delicious gourmet food. Razz cherries are dried cherries infused with raspberry and they are like candy, only better.

So...cocktails and razz cherries in very hot weather during spring break which is paradoxically the busiest time of year for me at work? What does that add up to? All it means is that I haven't been cooking at all. Which will change.

Just as soon as I get back from the beach...

Gin Martini:
(serves as many as you would like
)
Ice cold gin (store in freezer), I like Tanqueray
Clean, fresh ice
Splash vermouth

Directions:
Pour cold gin over ice in a martini shaker, add splash vermouth. Shake vigorously, strain into a frozen martini glass. Serve with your favorite garnish. In this weather, I like a twist of lime.

Sunday, March 04, 2007

Ceviche for Beginners


I adore ceviche and have eaten a vast variety. Made with scallops, shrimp, halibut, squid or any other random bit of seafood (or any combination thereof), I still love it. I've tried it saucy, dry, spicy, bland, with lots of vegetables and without - but I have never made it myself.

So, thanks to the brilliant idea from Kelley, she and I made our first batch.

We used the wild-caught Gulf of Mexico shrimp we adore and tilapia, coupled with an avocado and cucumber in a spicy lime-salsa juice. Delicious with tortilla chips!

Shrimp and Tilapia Ceviche:
(makes about 2 cups)

1 tilapia fillet, cubed
6 medium raw shrimp, halved lengthwise
Juice of 2-3 limes
Juice of 1 large or 2 small lemons
Salt and pepper
1 c fresh salsa (preferably spicy and full of cilantro)
1 large avocado, cubed
1 small cucumber, cubed

Directions:
Mix juice of lemons and limes with seafood and salt and let stand at room temperature until the fish begins to "cook", about 5-10 minutes. Mix in salsa, let stand another few minutes. If the shrimp is pink and the fish becomes opaque, you are on your way. Add vegetables, salt to taste and either serve or let stand in the refrigerator for up to an hour.

A note on preparation:
The traditional way to "cook" the seafood in ceviche is with the acid from the lemons and limes, but if you are serving this to anyone with a weakened immune system or small children, or you are just cautious, blanch seafood quickly in boiling water before proceeding to ensure the seafood is cooked. Don't overcook or the seafood ceviche will taste like little bits of seafood flavored rubber.

Tuesday, February 06, 2007

BBQ Spiced Candied Cashews


Smoky, sweet and a little spicy, this recipe works with almost any nut. Snack on them, or use them to top salads.

BBQ Spiced Candied Cashews:
(makes 1 lb, about 4 cups)

16 oz whole, raw cashews or other nut
1/2 c dark brown sugar
1 tsp salt
1 tsp paprika
1 tsp cayenne pepper
1 tsp nutmeg
1/2 tsp black pepper
1/2 tsp crushed red pepper

Directions:
Heat nuts in a large skillet over medium heat, tossing frequently until they begin to lightly toast. Meanwhile, mix all dry spices. Add sugar and the amount of dry mixture you prefer to saute pan. Continue to stir/toss until sugar is melted and nuts are covered in glossy dark brown coating. Ensure all sugar has melted. Pour over parchment paper, trying to form one layer with nuts as far apart as possible. Sprinkle with salt to taste. Let cool, break apart and store in an airtight container until serving.

Sunday, January 21, 2007

Prosciutto, Basil, Parmesan & Truffle Oil Flatbread


This is my idea of football food. I made this during the oh-so-important Chicago Bears vs. New Orleans Saints game this afternoon and paired it with a sturdy Tuscan red wine. Hailing from Chicago, I have to say it is gratifying to finally see the Bears heading to a Super Bowl - especially since my local Cardinals suck, still.

I will admit I went shopping with my friend Melanie for a good portion of the game, but upon hearing who won, was elated for my long-suffering Bears. Go Bears!

This pizza is a grown-up version of the classic with excellent saltiness from the prosciutto and parmesan combined with sweetness from basil and a delicious earthiness from the white truffle oil. Store or restaurant bought dough makes it easy.

Prosciutto, Basil, Parmesan & Truffle Oil Flatbread:
(serves 4)

1 lb fresh pizza dough
Olive oil
Salt and Pepper
2 cups Fontina Cheese, grated finely
Parmigiano Reggiano, to taste
1/2 cup roughly torn pieces of prosciutto
1 cup fresh basil leaves, uncut
3 large basil leaves, cut into ribbons
1 tsp white truffle oil, or to taste

Directions:
Let dough come to room temperature. Get your oven REALLY hot - as high as it will go.

Lightly grease a baking sheet, spread dough out and drizzle with olive oil, salt and pepper. Bake until almost browning. Top with more olive oil, then basil leaves & prosciutto and then cheese (fontina first, then parm). Sprinkle with basil ribbons. Return to oven, bake until golden brown and crisp. Before serving, drizzle with white truffle oil.

Tuesday, November 07, 2006

Culinary Giants - or How I Made Homemade Tamales


There are some culinary achievements that I just chalk up to:
• Way out of my league
• Why bother when you can buy it better and cheaper
• No experience
• Takes too much time
• Scary ingredients that I can’t find in my local stores

Tamales, a regional specialty and holiday tradition, are one of those “culinary giants” for me. That is, until friend and co-worker Sarah confided that she had always wanted to try making tamales and so we joined forces.

We visited Ranch Market, consulted the expert recipe provider Rick Bayless, forced our husbands/boyfriends to help, and plunged ahead.
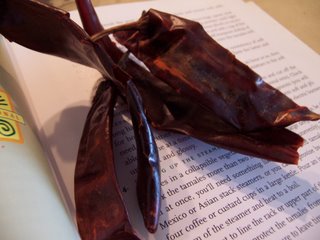
And…we surprised ourselves. Tons of work, exhausting, but absolutely sublimely delicious. A new annual tradition. I couldn’t help but have a moment of pause as we had a modern kitchen with tons of appliances and such and still labored…I am so impressed with generations before us who made these with nothing more than basic kitchen tools and their bare hands. Impressed doesn’t do it justice.

Here are some photos of the process, and the delicious recipes.

My tips for success:
• Allow a minimum of 8 hours (esp. if you are tripling the recipe)
• I recommend at least tripling the recipe (after all that work, make a lot!!)
• Avoid the banana leaves – they look cool but are hard to work with and more expensive. Roll all in cork husks. Trust me.
• Use kitchen twine, the husk wrapper ties look cool, but 6-8 hours in you’ll find the attention to detail is a pain in the butt. Sorry if that’s cheating, but twine is oh-so-efficient!
• Make the fillings ahead of time – as they are both chili/meat stews, they keep well.
• Have at least 3-4 sets of hands for filling/rolling/tying.
• Have other food items to munch on and lots of drinks – keeps morale high and your team will see you through the end of the day.
• Your back and feet will hurt – don’t make big plans for that night.

Green Chile Chicken Tamales
By Rick Bayless*

Makes about 26


FILLING
1 8-ounce package dried corn husks, soaked in water at least 3 hours or overnight

1 pound tomatillos, husked, rinsed
4 3-inch-long serrano chiles, stemmed, chopped
4 large garlic cloves, chopped
1 1/2 tablespoons olive oil
2 cups low-salt chicken broth
4 cups (packed) coarsely shredded cooked chicken (about 1 pound; from purchased rotisserie chicken)
2/3 cup chopped fresh cilantro

DOUGH
1 1/3 cups lard or solid vegetable shortening
1 1/2 teaspoons salt (omit if masa mixture contains salt)
1 1/2 teaspoons baking powder (omit if masa mixture contains baking powder)
4 cups freshly ground masa dough for tamales (34 to 36 ounces), or make masa dough with 3 1/2 cups masa harina (corn tortilla mix; about 17 ounces) mixed with 2 1/4 cups warm water
2 cups (about) low-salt chicken broth

FOR FILLING : Place husks in large pot or large bowl; add water to cover. Place heavy plate on husks to keep submerged. Let stand until husks soften, turning occasionally, at least 3 hours and up to 1 day.

Preheat broiler. Line heavy baking sheet with foil. Arrange tomatillos on prepared sheet. Broil until tomatillos blacken in spots, turning once, about 5 minutes per side. Transfer tomatillos and any juices on sheet to processor and cool. Add chiles and garlic to processor and blend until smooth puree forms. Heat oil in medium saucepan over medium-high heat. Add tomatillo puree and boil 5 minutes, stirring often. Add broth. Reduce heat to medium; simmer until sauce coats spoon thickly and is reduced to 1 cup, stirring occasionally, about 40 minutes. Season with salt. Mix in chicken and cilantro. (Can be made 1 day ahead. Cover and chill.)
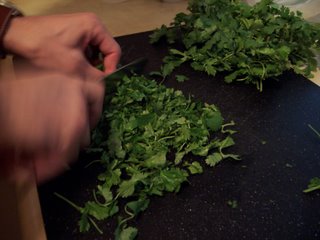
FOR DOUGH : Using electric mixer, beat lard (with salt and baking powder, if using) in large bowl until fluffy. Beat in fresh masa or masa harina mixture in 4 additions. Reduce speed to low and gradually beat in 1 1/2 cups broth, forming tender dough. If dough seems firm, beat in enough broth, 2 tablespoons at a time, to soften.
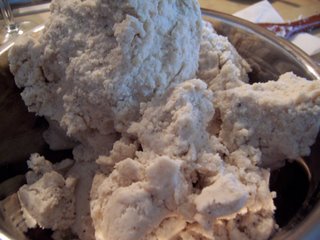
Fill bottom of pot with steamer insert with enough water (about 2 inches) to reach bottom of insert. Line bottom of insert with some softened corn husks. Tear 3 large husks into 1/4-inch-wide strips to use as ties and set aside. Open 2 large husks on work surface. Spread 1/4 cup dough in 4-inch square in center of each, leaving 2- to 3-inch plain border at narrow end of husk. Spoon heaping tablespoon filling in strip down center of each dough square.
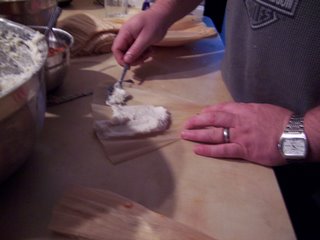
Fold long sides of husk and dough over filling to cover. Fold up narrow end of husk. Tie folded portion with strip of husk to secure, leaving wide end of tamale open.
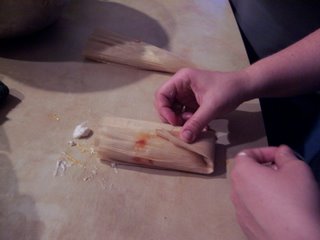
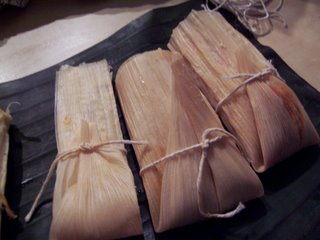
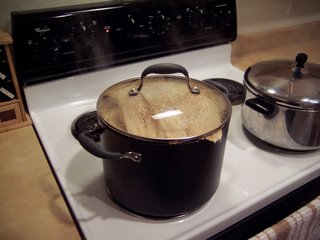
Stand tamales in steamer basket. Repeat with more husks, dough, and filling until all filling has been used. If necessary to keep tamales upright in steamer, insert pieces of crumpled foil between them. Bring water in pot to boil. Cover pot and steam tamales until dough is firm to touch and separates easily from husk, adding more water to pot as necessary, about 45 minutes. Let stand 10 minutes. (Can be made 2 days ahead. Cool 1 hour. Cover and chill. Before serving, re-steam tamales until hot, about 35 minutes.)
Red Chili Pork Tamales
By Rick Bayless*

Makes about 18 tamales


For the filling:
16 large (about 4 ounces) dried guajillo chiles, stemmed, seeded and each torn into several pieces
4 garlic cloves, peeled and chopped
1/2 teaspoon black pepper, preferably freshly ground
1/4 teaspoon cumin, preferably freshly ground
1 1/2 pounds lean boneless pork (preferably from the shoulder), cut into 1/2-inch cubes
Salt

For the batter:
10 ounces (1 1/3 cups) rich-tasting pork lard (or vegetable shortening if you wish), slightly softened but not at all runny
1 1/2 teaspoons baking powder
2 pounds (4 cups) fresh coarse-ground corn masa for tamales OR 3 1/2 cups dried masa harina for tamales mixed with 2 1/4 cups hot water
1 to 1 1/2 cups chicken broth
2 1-pound packages banana leaves, defrosted if frozen

1. Preparing the filling. In a large blender or food processor (or working in batches), combine the chiles, garlic, pepper and cumin. Add 3 cups water, cover and blend to a smooth puree. Strain the mixture through a medium-mesh strainer into a medium-size (3-quart) saucepan.
Add the meat, 3 cups water and 1 teaspoon salt. Simmer, uncovered, over medium heat, stirring regularly, until the pork is fork-tender and the liquid is reduced to the consistency of a thick sauce, about 1 hour. Use a fork to break the pork into small pieces. Taste and season with additional salt if necessary. Let cool to room temperature.

2. Preparing the batter. With an electric mixer on medium-high speed, beat the lard or shortening with 2 teaspoons salt and the baking powder until light in texture, about 1 minute. Continue beating as you add the masa (fresh or reconstituted) in three additions. Reduce the speed to medium-low and add 1 cup of the broth. Continue beating for another minute or so, until a 1/2-teaspoon dollop of the batter floats in a cup of cold water (if it floats you can be sure the tamales will be tender and light). Beat in enough additional broth to give the mixture the consistency of soft (not runny) cake batter; it should hold its shape in a spoon. Taste the batter and season with additional salt if you think necessary.
For the lightest textured tamales, refrigerate the batter for an hour or so, then rebeat, adding enough additional broth or water to bring the mixture to the soft consistency it had before.

3. Preparing the banana leaves. Unfold the banana leaves and cut off the long, hard sides of the leaves (where they were attached to the central vein). Look for holes or rips, then cut leaves into unbroken 12-inch segments (you will need 20). Either steam the segments for 20 minutes to make them soft and pliable, or one at a time pass them briefly over an open flame or hot electric burner until soft and glossy.

4. Setting up the steamer. Steaming 20 leaf-wrapped tamales can be done in batches in a collapsible vegetable steamer set into a large, deep saucepan (if you stack the tamales more than two high they will steam unevenly). To steam the whole recipe at once, you’ll need something like the kettle-size tamal steamers used in Mexico or Asian stack steamers, or you can improvise by setting a wire rack on 4 coffee or custard cups in a large kettle.
It is best to line the rack or upper part of the steamer with leftover scraps of banana leaves to protect the tamales from direct contact with the steam and to add more flavor. Make sure to leave tiny spaces between leaves so condensing steam can drain off.

5. Forming the tamales. Cut twenty 12-inch pieces or string or thin strips of banana leaf. One at a time, form the tamales: Lay out a square of banana leaf, shiny-side up, and spread 1/3 cup of the batter into an 8x4-inch rectangle over it (as shown in the illustration). Spoon 2 tablespoons of the filling over the left side of the rectangle of batter, then fold in the right third of the leaf so that the batter encloses the filling. Fold in the uncovered third of the leaf, then fold in the top and bottom. Loosely tie the tamales with string and set them in the steamer.

6. Steaming and serving the tamales. When all the tamales are in the steamer, cover them with a layer of banana leaf scraps or leftovers. Set the lid in place and steam over a constant medium heat for about 1 1/4 hours. Watch carefully that all the water doesn’t boil away and, to keep the steam steady, pour boiling water into the pot when more is necessary.

Tamales are done when the leaf peels away from the masa easily. Let tamales stand in the steamer off the heat for a few minutes to firm up. For the best textured tamales, let them cool completely, then re-steam about 15 minutes to heat through.

Working Ahead: Both filling and batter can be made several days ahead, as can the finished tamales; refrigerate, well covered. Re-steam (or even microwave) tamales before serving. For even more flexibility, batter, filling or finished tamales can be frozen. Defrost finished tamales in the refrigerator overnight before re-steaming.

* Recipes excerpted from Mexico One Plate at a Time by Rick Bayless (Scribner). Please note that recipes are copied and pasted from the Web published version.

Sunday, November 05, 2006

Fresh Baja Shrimp


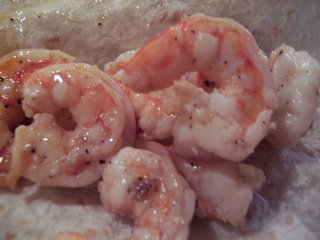
Mexico is as enchanting as ever, and one of my favorite things about it is the fresh shrimp. Prepared simply with butter, salt and pepper and preferably paired with some fresh tortillas and homemade salsa, it's a simple yet delicious supper.

Shrimp Tacos:
(serves 4)

1 lb fresh baja shrimp, shelled & deveined
2 tbs butter
Salt and pepper to taste
Fresh tortillas (corn or flour)
Salsa

Directions:
Peel and devein shrimp, melt butter in a saute pan and saute shrimp just until they turn pink. Don't overcook. Season with salt and pepper and serve with warm fresh tortillas and salsa.

Thursday, November 02, 2006

Chicken Liver Pate with Sherry


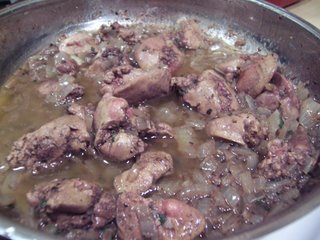
Wow, a whole container of chicken livers lurked in my fridge following my cornbread sage stuffing adventure, and what to do with livers besides throw them away or turn them to rubber with a side of onions? Pate is the natural (and only) answer. This recipe is a variation on this classic from Gourmet in November of 2003.

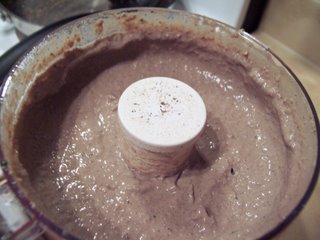
It was not pretty to "trim" livers that have been floating in bloody brine, the little snack sure isn't photogenic, and do we even need to talk about how non-healthful it is with all that butter...so what is the redeeming quality? I am thankful that is has one - a big one - the taste. This is delicious and sure to be a plate-clearer at any party you host or attend.

Sherry Chicken Liver Pate:
(serves 8-10 as an appetizer)

1 lb chicken livers, trimmed
1 medium onion, minced
1 large clove garlic, minced
1.5 sticks of butter
1 tsp fresh sage, chopped (can use dried)
1 tsp fresh thyme, chopped (can use dried)
1 tsp fresh oregano, chopped (can use dried)
1/4 cup sherry
1 tsp ground allspice
1 tsp salt and fresh ground black pepper (or to taste)

Directions:
Saute chicken livers, onions and garlic in 1 stick butter. Add herbs and spices, saute until livers are cooked but still pink inside, about 8 minutes. Remove from heat, add sherry and stir to incorporate.

Puree all ingredients in a food processor.

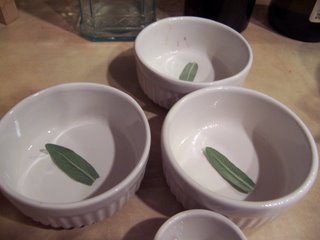
Before spreading into dishes, place an herb down in the bottom of the dish to enhance presentation when you invert - I also highly recommend greasing your dishes, or line them in plastic wrap so you don't make yourself crazy when serving them.

Meanwhile, melt remaining half stick of butter, skim off milk solids. Pour clarified butter over pate to form a seal. Chill, uncovered for about 2 hours, then either serve or cover/chill and serve within 2 weeks, or freeze immediately for later service.

Sunday, October 29, 2006

Happy Halloween!


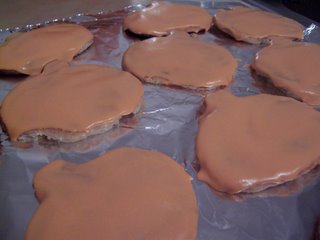
I haven't baked and decorated sugar cookies since I was a kid, but there I was, browsing around a truly gross discount store (albeit with good merchandise sometimes) and ran across the cutest tea towels with a sugar cookie recipe and a cookie cutter attached. They were fall themed - leaves, pumpkins and turkeys - and I bought one of each. I just couldn't resist. Here's the pumpkin one...

Sugar Cookies:
(makes about 24 cookies)

1.5 cups sugar
1.5 sticks butter
2 eggs
2 tbs milk
1 tsp vanilla extract
3 1/4 c AP flour
2.5 tsp baking powder
1 tsp salt

Directions:
Preheat oven to 400. Mix all ingredients well, let chill in refrigerator for minimum of 2 hours. Roll out dough between 2 sheets of waxed paper. Cut out shapes, bake for about 8 minutes or until light golden brown.


Buttercream Frosting:
(makes enough for 24 large sugar cookies)

1/3 cup butter, softened to room temperature
2 cups powdered sugar
2 tbs milk (or as needed for desired consistency)
Red and yellow food coloring

Directions:
Mix well, add food coloring to desired color(s).